Pet odour removal for W1 carpets and upholstery
Posted on 18/06/2026
If you live or work in W1, you already know how quickly a home can go from fresh to faintly pet-scented after one muddy paw, one accident, or one damp afternoon by the skirting board. Pet odour removal for W1 carpets and upholstery is not just about masking a smell. It is about dealing with what is actually in the fibres, the backing, and sometimes the underlay too. That is the difference between a room that smells "a bit better" and one that genuinely feels clean again.
This guide breaks down how pet odours build up, what really works on carpets and soft furnishings, when DIY makes sense, and when a deeper professional clean is the safer call. If you are trying to protect a rental deposit, keep a flat pleasant for guests, or simply stop that stubborn whiff from coming back every time the heating goes on, you are in the right place.
For wider context on the types of cleaning support available locally, you may also find the services overview useful, especially if the odour has spread beyond one room.
Why Pet odour removal for W1 carpets and upholstery Matters
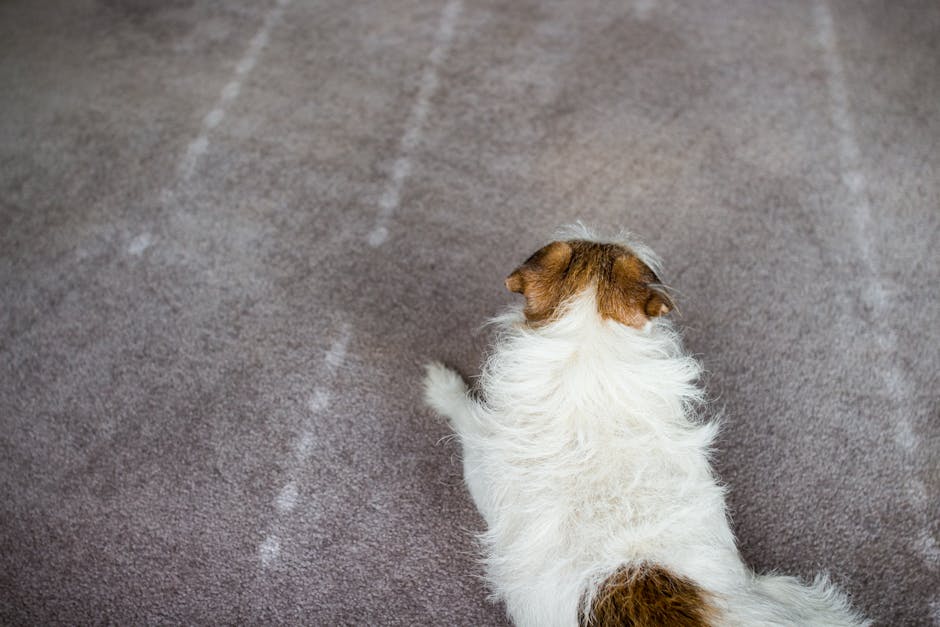
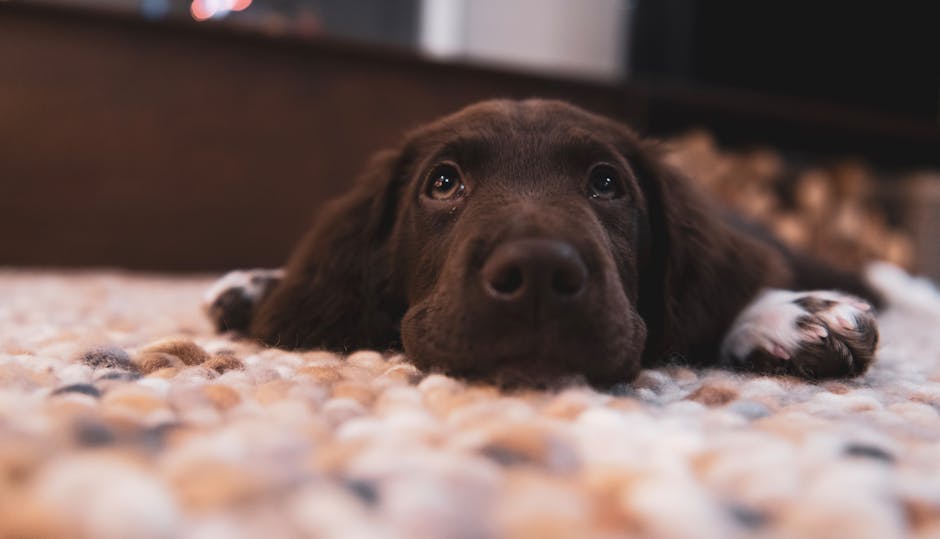
Pet odour has a way of hanging around. You might clean the visible mess, open a window, light a candle, and still notice a stale smell hours later. That is because carpets and upholstered furniture are absorbent. They trap urine residues, saliva, dander, bacteria, and moisture in the fibres. Once those residues settle into the pile or padding, the smell can reappear when the room warms up or humidity changes.
In W1, where many homes have older flooring, fitted carpets, antique rugs, or carefully chosen upholstery, that matters even more. A quick scrub can be too harsh for delicate fabrics, while a weak surface clean can leave the source untouched. Truth be told, that is where a lot of disappointment starts: the room looks fine, but the odour keeps announcing itself. Not ideal, especially in a compact flat where the smell seems to fill everything within minutes.
It also matters for comfort and reputation. If you rent out a property, host guests, or simply want your living room to feel calm again, lingering pet smells can make the whole place feel less cared for. And in small W1 homes, there is nowhere to hide it. A heavy smell from the sofa or hallway carpet can drift everywhere by tea time.
A practical point worth saying plainly: not all pet smells are caused by the same thing. Urine behaves differently from wet dog odour, and both differ from general pet dander or litter box smells. If you treat all odours the same, you usually get mixed results.
For readers dealing with older or more delicate textile pieces, the advice in preserving antique area rugs is a good companion read, because the wrong deodorising approach can do more harm than good.
How Pet odour removal for W1 carpets and upholstery Works
Effective odour removal starts with one simple idea: you have to remove the source, not just cover the smell. Sprays and air fresheners can temporarily change the scent profile, but they do not break down the residue sitting inside the carpet or upholstery. That residue is what keeps reactivating the odour.
The process usually works in layers:
- Identify the source area. Sometimes the visible stain is not the only affected spot. Pet urine, for example, can wick outward beneath the surface.
- Test the material. Carpet fibre, backing, padding, and upholstery fabric all react differently to moisture and cleaning agents.
- Pre-treat the area. A suitable cleaner helps loosen residues before extraction or careful blotting.
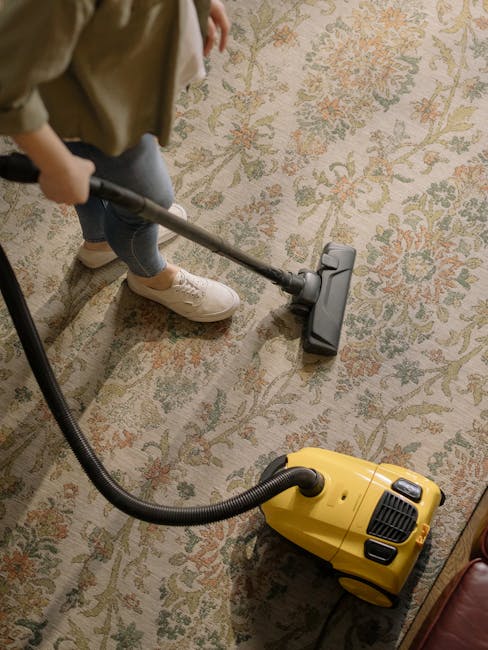
- Deep clean the fibres. This is often where hot water extraction, controlled washing, or specialist fabric-safe treatment comes in.
- Neutralise the odour source. Enzymatic or targeted odour treatments can help break down organic matter rather than just perfume it.
- Dry thoroughly. Damp fabric can create a new stale smell of its own. Faster drying matters more than people think.
In simple terms, the cleaner has to reach where the smell lives. On a carpet, that can mean the pile, the backing, and sometimes the underlay. On a sofa or armchair, it may mean the cushions, seams, and the hidden areas where pets like to curl up. If you have ever noticed a sofa smelling worse when you sit down and warm it up, that is usually the trapped residue speaking up again. Charming stuff, really.
Professional cleaning often uses controlled moisture and extraction so the fabric is not over-wet. That is especially useful in W1 properties, where dry time and ventilation can be limited by layout, weather, or just the practical reality of a busy London home.
Key Benefits and Practical Advantages
When the job is done properly, the benefits go beyond a nicer smell. You usually get a fuller reset of the room.
- Better indoor comfort. Fresh carpets and upholstery make a room feel lived-in, not trapped in yesterday.
- Improved appearance. Odour removal often goes hand in hand with stain reduction and fibre revival.
- Longer material life. Repeated DIY soaking or overuse of harsh products can wear down fabrics. A measured clean is gentler.
- Less embarrassment. This sounds small until you are bringing someone into the flat and hoping they do not notice the sofa first.
- Better results for landlords and tenants. Smell is one of the first things people notice in a move-out or move-in inspection.
- More suitable for delicate interiors. W1 homes often contain mixed materials, from wool carpets to textured upholstery, and each needs a different touch.
Another advantage is consistency. Once the source is neutralised, the smell is less likely to return after a warm day, a rainy week, or the heating switching on in the evening. That is where real value lives. Not in a quick pleasant scent, but in a room that stays normal.
If you are already dealing with broader household cleaning, the guide to domestic cleaning in Marylebone may help you think about pet odour as part of the wider cleaning picture rather than as a single isolated stain problem.
Who This Is For and When It Makes Sense
This kind of cleaning is useful for all sorts of people. The obvious group is pet owners, but the list is bigger than that.
- Pet owners dealing with recurring smells from accidents, sleep areas, or damp coats after walks.
- Renters who need to leave a property fresh and avoid disputes over odour or cleanliness.
- Landlords and letting agents preparing a property for the next occupant.
- Families with young children who want soft furnishings to feel hygienic and comfortable.
- Homeowners who have tried DIY cleaning and can still smell something, especially near skirting boards or under cushions.
- Office or studio users if pets are occasionally present and the furniture has started to hold onto odours.
It makes sense when the smell is persistent, localised, or returning after surface cleaning. It also makes sense after a known accident, especially if the material is absorbent or the spill was left for a while. If you are asking, "Can I just use a supermarket spray and hope for the best?" the honest answer is: sometimes for a tiny fresh issue, yes. But if the smell has taken hold, probably not.
There is also a timing element. The sooner you treat the affected area, the better your odds. Fresh pet contamination is easier to neutralise than an old, dried-in smell that has settled through the whole stack of materials. That part is frustrating, but it is how fibres work.
Step-by-Step Guidance
If you want to tackle pet odour removal sensibly, follow a method rather than improvising. It saves time, and it reduces the chance of making the smell worse.
1. Find the full affected area
Do not rely only on the obvious stain or the smelliest spot. Use your nose, a torch, and a bit of patience. Check around the edges, under cushions, along seams, and near the carpet under furniture. Pet urine can spread further than you expect. It really can.
2. Blot, lift, and remove what you can
If the issue is fresh, blot rather than rub. Rubbing pushes residue deeper into the fibres. Use absorbent cloths or paper towels and work from the outside in. If a solid mess is present, remove it carefully before any moisture is added.
3. Use a fabric-appropriate pre-treatment
Choose a cleaner that suits the material. A wool carpet and a synthetic sofa fabric are not the same thing, and they should not be treated as if they were. Always test a discreet spot first. A cleaner that looks harmless on a bottle can still leave shading or texture changes on a delicate textile.
4. Break down the odour source
For pet urine, enzymatic products are often considered because they target organic residues. For general pet odour, a suitable fibre-safe deodorising treatment may be enough. The key is to follow dwell time carefully. If the product needs time to work, give it time. Early removal can reduce the effect. Slightly annoying, yes. But important.
5. Extract or rinse properly
Once the treatment has done its job, remove it thoroughly. On carpets, that may mean extraction with controlled moisture. On upholstery, it may mean careful rinse-out or low-moisture cleaning. Leaving excess product in the fabric can create a sticky residue and attract more dirt.
6. Dry with real attention
Drying is a major part of odour removal. Open windows where practical, use airflow, and avoid putting cushions back too soon. A damp sofa or carpet can smell stale by evening, especially in a typical London flat where air circulation is not always generous. Nobody needs that.
7. Reassess after drying
Smell the area again once it is fully dry. This matters because some odours only become obvious after moisture leaves. If the smell remains, a second treatment or a deeper clean may be needed. For older contamination, you may need to reach the underlay or cushion filling.
For situations involving sudden water ingress or damp that could make odours worse, the article on emergency basement flood cleanup in Marylebone offers useful context on moisture control, which is often half the battle.
Expert Tips for Better Results
A few small choices make a big difference. These are the details people often miss.
- Tackle the source as early as possible. The longer pet residue sits, the deeper it migrates.
- Use less water than you think. More is not always better with upholstery, especially on foam-filled items.
- Pay attention to hidden zones. Under cushions, along seams, and under rugs are classic trap points.
- Ventilation matters. Fresh air plus gentle warmth can help, but do not overheat delicate fabrics.
- Be careful with perfumed sprays. They can mix with the existing smell and create something worse. A bit like cheap aftershave on top of wet dog. Not good.
- Match the method to the fabric. Velvet, wool, cotton blends, synthetics, and leather all need different handling.
In our experience, the best results come from a calm, measured process. People often start in a rush because the smell is annoying them, and fair enough. But rushed cleaning usually spreads the problem. Take the extra ten minutes to inspect properly. You will notice the difference later.
If a pet accident happened near a stain from another spill, or you are dealing with more than one issue in the same room, it can help to read about rapid stain rescue for wine and coffee in Marylebone. Mixed contamination needs more careful planning than one-off spot cleaning.
Common Mistakes to Avoid
Some mistakes are surprisingly common. They are also the ones most likely to leave you back where you started.
- Using too much perfume. If it smells strongly floral but still smells like pet underneath, the problem has not gone away.
- Scrubbing aggressively. This can damage the pile, distort fibres, and push residues deeper.
- Over-wetting upholstery. Moisture inside cushions can create mildew-like smells or leave the item feeling musty for days.
- Ignoring the underlay. A carpet can seem clean while the padding underneath still holds the odour.
- Mixing random products. Some cleaners do not play nicely together. Best not to experiment unless you like mystery reactions.
- Putting furniture back too soon. That traps damp underneath and can mark the carpet.
- Assuming one clean will fix old contamination. Deep-set odour often needs staged treatment.
Another mistake is delaying action because the smell seems to fade temporarily. It often returns when the room warms up or when humidity changes. Morning might seem fine; by evening, there it is again. That cycle is frustrating, but it also tells you the residue is still present.
Tools, Resources and Recommendations
You do not need a huge kit to handle a fresh issue, but the right tools help you avoid making things worse.
| Tool or product | Best use | Why it helps |
|---|---|---|
| Microfibre cloths | Fresh accidents and blotting | Absorbs moisture without roughing up the fibres |
| Enzymatic cleaner | Organic pet residue | Targets the source of many urine-based odours |
| Soft brush | Gentle agitation on carpets | Helps lift residue without harsh scrubbing |
| Wet extraction machine | Deeper carpet cleaning | Removes loosened contamination and rinse solution |
| Air mover or fan | Drying upholstered items | Shortens drying time and reduces stale smells |
| Protective gloves | Any contamination cleanup | Keeps the process cleaner and more hygienic |
There are also a few practical references on this site if you are trying to plan wider care of the home. The carpet cleaning in Marylebone page is useful if the smell is in both the carpet and the room generally, while upholstery cleaning in Marylebone is the better fit when the sofa, armchair, or dining chairs are the main issue.
For a broader understanding of how the company approaches jobs, about us gives useful background, and the insurance and safety page may matter if you are inviting cleaners into a home with valuable furnishings or tight access. That sort of reassurance is not glamorous, but it matters.
Law, Compliance, Standards, or Best Practice
Pet odour removal is usually a cleaning and property-care issue rather than a legal one, but there are still a few best-practice points worth keeping in mind.
First, if you rent out a property or are moving out, odour can form part of the general expectation that the home is returned in a reasonably clean and presentable condition. The exact standard depends on the tenancy agreement and the condition of the property at the start, so it is best to check the documents rather than assume. No one enjoys that admin, admittedly, but it saves arguments later.
Second, cleaning products should always be used according to the label instructions. That sounds obvious, yet it is where many mishaps happen. Some products are not suitable for wool, silk blends, antique fabrics, or certain dyes. Best practice is to test before use and avoid mixing products unless the manufacturer clearly says it is safe.
Third, hygiene and safety matter. If there is visible biological contamination, handle it carefully, ventilate the area, and wash hands afterwards. For larger or recurring problems, especially where moisture has reached the underlay or furniture stuffing, a deeper professional approach is usually the safer option.
Finally, if you are living in a managed building or a shared property, avoid methods that create excess noise, leaks, or strong fumes without checking building rules. W1 blocks and mansion flats can be sensitive environments, and a good clean should not create a new complaint. That would be a bit ironic, wouldn't it?
For residents interested in local property and household context, the article on living in Marylebone offers a sense of everyday considerations in the area, while the Marylebone real estate buying guide is useful if you are maintaining a home as an owner, investor, or soon-to-be buyer.
Options, Methods, or Comparison Table
Not every odour problem needs the same solution. Here is a practical comparison to help you decide what level of treatment makes sense.
| Method | Best for | Strengths | Limitations |
|---|---|---|---|
| Surface deodorising spray | Very light, fresh smells | Quick and simple | Only masks or lightly reduces the smell |
| DIY enzymatic spot treatment | Fresh pet accidents on washable fabrics | Targets organic residue better than perfume | May be insufficient for old or deep contamination |
| Controlled carpet cleaning | Carpets with localised odour | Reaches deeper into fibres and backing | Needs drying time and proper technique |
| Upholstery cleaning | Sofas, chairs, cushions | More thorough than wipe-down cleaning | Not all fabrics can tolerate the same moisture level |
| Deep remedial treatment | Old urine odour or repeated incidents | Best chance of removing the source | Takes more time and may involve repeat visits |
As a rule of thumb, if the odour is recent and light, a careful DIY approach may be enough. If it has been there a while, keeps returning, or affects more than one item, a more thorough treatment is usually worth it. Sometimes the sensible answer is simply to stop fiddling and let the fibres be properly cleaned. That is not dramatic, just practical.
For event-related or post-guest cleanups, this write-up on quick floor recovery after events is relevant because pet odour can get worse after a busy weekend, open windows, and a lot of foot traffic.
Case Study or Real-World Example
A small W1 flat with a fabric sofa and fitted carpet had a recurring odour in the living room. The owners had already used a standard spray cleaner, and for a while it seemed fine. By the following evening, especially when the heating was on, the smell returned. The sofa looked clean enough, which is often how these jobs begin: visually acceptable, but not actually resolved.
The first step was a careful inspection of the sofa seams, cushion base, and the carpet underneath the front edge. That was where the problem sat. The top surface had been cleaned, but moisture and residue had moved deeper into the cushioning and the carpet backing. A surface-only approach was never going to solve that.
A staged treatment was used: targeted pre-treatment, gentle agitation, controlled extraction, and then thorough drying with strong airflow. The result was not just a better scent. The room stopped re-activating the smell when warmed up, and the sofa felt fresher rather than perfumed. Small difference on paper, big difference in real life.
It is a good reminder that pet odour removal is often about diagnosis as much as cleaning. If you misread the source, you treat the symptom and leave the cause behind.
Practical Checklist
Use this checklist before and during cleanup. It keeps things sensible.
- Identify whether the odour is from urine, wet pet smells, dander, or a mix.
- Check carpets, rugs, cushions, seams, and hidden fabric areas.
- Blot fresh contamination rather than rubbing it in.
- Test any cleaner on a hidden patch first.
- Use a method suited to the fabric type.
- Avoid over-wetting soft furnishings.
- Allow enough dwell time for the product to work.
- Extract or rinse thoroughly after treatment.
- Dry fully before replacing cushions or furniture.
- Recheck the area once dry to confirm the odour has really gone.
If you want to keep the rest of the property in good shape too, the advice in Marylebone High Street carpet care tips is a handy companion. It covers everyday upkeep that helps prevent odours from settling in the first place.
Get a free quote today and see how much you can save.
Conclusion
Pet odour removal for W1 carpets and upholstery is really about restoring comfort, not chasing a temporary smell. Once you understand where the odour lives, you can choose the right method, protect the fabric, and avoid the usual mistakes that make the problem linger. In a busy London home, that difference is worth quite a lot.
Whether you are dealing with a single accident, a stubborn sofa smell, or a whole room that needs freshening up, the most reliable approach is careful, fabric-aware, and thorough. A clean that lasts is always better than one that just smells nice for an afternoon.
And if the room feels a little lighter afterwards, well, that is the point. Fresh air, clean fibres, a bit of peace. Simple things, but they change how a home feels.